
Introduction to Winter Paper Crafts
Winter paper crafts are a delightful way to embrace the chilly season. They bring warmth and creativity to any home. From delicate paper snowflakes to cheerful greeting cards, these crafts are perfect for all ages. Engaging in winter paper crafting can be both a festive activity and a stress reliever. With simple tools like scissors, glue, and various paper types, anyone can start this hobby. Whether you want to decorate your home or create handmade gifts, winter paper crafts offer infinite possibilities. By following this cozy DIY guide, you’ll learn the essentials that will help you craft your way through the winter season. In the upcoming sections, we’ll explore beginner-friendly ideas, step-by-step tutorials, and tips for preserving your creations. Let’s dive into the world of winter paper crafts and spread some handmade joy!

Essential Tools and Materials for Paper Crafting
To begin your winter paper crafts, gathering the right tools and materials is crucial. Here is a list of essentials you’ll need:
- Scissors: Sharp scissors are vital for precision cutting.
- Paper: Stock up on a variety of papers, like construction, origami, and cardstock.
- Glue: Choose from glue sticks, liquid glue, or double-sided tape.
- Ruler: A ruler will help ensure straight lines and even measurements.
- Pencil and Eraser: For sketching designs before cutting.
- Cutting Mat: Protects your table when cutting with precision knives.
- Bone Folder: An optional tool for crisp folds in paper.
- Embellishments: Items like glitter, stickers, and markers can add flair.
Select high-quality materials to ensure your crafts look their best. Experiment with colors and textures to bring your winter paper crafts to life. Think icy blues, shimmering whites, and cozy reds and greens to echo the winter palette. Remember, the quality of your tools can affect the final outcome of your projects, so investing in good materials is important. With these tools at hand, you’re ready to start crafting stunning winter-themed decorations and gifts!
Beginner-Friendly Winter Paper Craft Ideas
Diving into winter paper crafts doesn’t have to be daunting. Start with simple projects that are easy to master. Consider these beginner-friendly ideas to kick off your crafting journey:
- Paper Snowflakes: These classics are unique and easy to make. Fold paper and snip away to reveal snowflake patterns.
- Greeting Cards: Handmade cards add a personal touch to any message. Use your paper and embellishments to design festive cards.
- Bookmarks: Craft bookmarks with winter themes. They make thoughtful gifts for your book-loving friends.
- Gift Tags: Forget store-bought tags. Create your own with paper and a little creativity.
- Paper Chains: A simple and fun way to add color to your room. Link strips of paper to form chains.
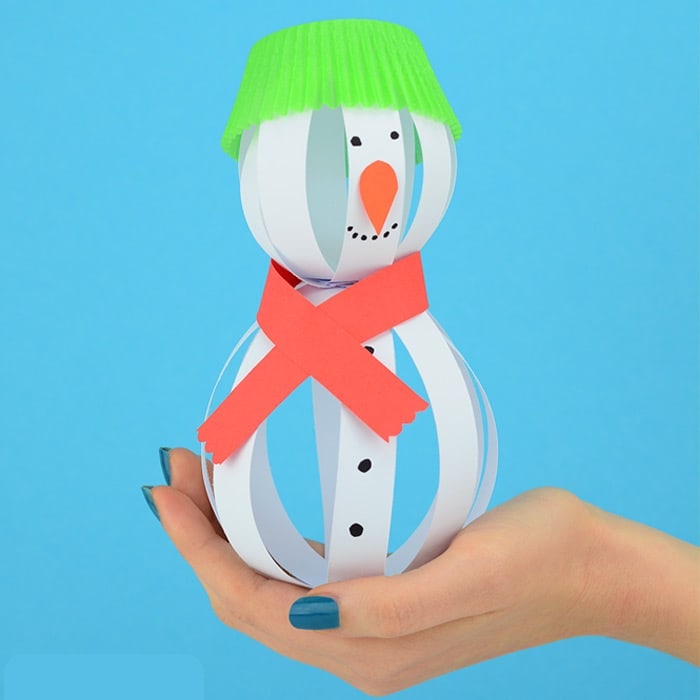
- Accordion Snowmen: Fold paper into accordion shapes, stack them to form snowmen figures.
These projects are perfect for starting out. They require minimal tools and materials. Plus, they all flex your creative muscles. Whether you are a novice or a seasoned crafter, you’ll enjoy making these adorable winter-themed items. Most importantly, remember to have fun and let your creativity shine through your winter paper crafts.
Step-by-Step Guide to Creating Paper Snowflakes
Paper snowflakes are a staple of winter paper crafts. They are as unique as they are beautiful and are a perfect project for crafters of any skill level. Here’s a simple guide to making your own paper snowflakes:
- Choose Your Paper: Select a square piece of paper. Thinner paper like origami is best for intricate cuts.
- Fold Your Paper: Fold the square diagonally to form a triangle. Repeat this to make a smaller triangle.
- Create the Design: Fold the triangle into thirds, forming a pie-slice shape. Trim off the top to create a straight edge.
- Cut Away: Use scissors to cut patterns along the edges and within the folds. Think triangles, circles, and wavy lines.
- Carefully Unfold: Gently unfold the paper to reveal your snowflake design. Flatten any creases with a bone folder if needed.
- Showcase Your Snowflake: Hang it up or attach it to your window with double-sided tape. Enjoy your lovely winter paper craft.
Always remember to use sharp scissors for precision. Be creative with your designs; no two snowflakes are the same. For an extra touch, sprinkle some glitter to mimic the sparkle of real snow. Crafting paper snowflakes not only adds to your winter decor but also makes for a fun activity to enjoy alone or with family and friends.
Crafting Winter Greeting Cards and Gift Tags
Winter paper crafts are not just about decorations; they also offer a fantastic way to send personal wishes. Crafting your own greeting cards and gift tags adds a special touch to any present or message. Here’s how you can make these heartfelt paper creations:
Begin with selecting high-quality cardstock or paper in colors that resonate with winter themes—think icy blues, whites, and warm reds. Using your scissors and ruler, cut the paper into the desired shapes and sizes. For greeting cards, you might opt for rectangles that can be folded in half, while gift tags can be smaller and of various shapes like circles, stars, or even Christmas tree outlines.
Once you have the base, let your creativity flow. Decorate with stickers, use markers to draw designs, or add a bit of shimmer with some glitter. A fine tip pen is great for writing personalized messages inside the cards or on the tags. If you’re feeling adventurous, experiment with embossing techniques to give your creations an elegant raised effect.
For gift tags, punch a hole at the top and thread a piece of ribbon or twine through it, so it can easily be attached to gifts. With greeting cards, ensure they are of a size that fits standard envelopes, or make custom ones with your leftover paper.
Remember, the beauty of these crafts lies in their handmade nature, so don’t worry if they’re not perfect. Your warm wishes will shine through the effort and love you put into making each card and tag for the winter season.
Decorative Paper Wreaths for the Winter Season
Decorative paper wreaths add charm and cheer to your winter decor. Crafting a wreath from paper is simple and offers flexibility in design. To make a paper wreath, begin by selecting sturdy paper like cardstock. Colors should echo winter themes; icy blues, whites, and festive reds and greens work well.
Next, cut long strips of paper about one inch wide. Bend these into loops and secure them with glue. Create a base from cardboard, shaping it into a circle. Arrange and glue the loops onto the base, layering for fullness. For a touch of nature, add paper leaves or berries.
You can personalize your wreath with add-ons like glitter, ribbon, or small ornaments. Hang them on doors or walls to spread winter warmth throughout your home. Making paper wreaths is a fun, engaging activity for all ages, perfect for family craft nights.
Innovative Paper Lanterns for Cozy Winter Nights
Creating paper lanterns can illuminate your home with a soft, inviting glow during the long winter nights. To start crafting your own, select vellum or thick tracing paper. These materials allow light to pass through softly, being perfect for lanterns. Here are the steps to make cozy winter lanterns:
- First, cut the paper into rectangles. The size depends on how large you want your lantern to be.
- Fold each rectangle in half lengthwise to create a crease.
- Along the folded edge, cut slits, leaving a border on the edges.
- Open the paper and roll it into a cylinder. Overlap the edges slightly to glue them together.
- Secure the top and bottom with a circle of paper or cardstock. This stabilizes the lantern and gives it shape.
- Insert a battery-operated tea light to safely light up your lantern.
For a winter touch, cut out shapes of snowflakes or stars before you roll them up. When lit, these designs cast beautiful shadows. This type of winter paper craft not only adds to the ambiance but is also a great activity to enjoy with family. Remember, always use battery-operated lights inside paper lanterns to avoid fire hazards.
Tips for Preserving and Framing Your Paper Crafts
After creating beautiful winter paper crafts, it’s natural to want to keep them safe and display them. Here are practical tips for preserving and framing your creations:
- Use Acid-Free Materials: To prevent yellowing, use acid-free paper, glue, and other materials.
- Keep Dry: Moisture is the enemy. Ensure crafts are dry before framing.
- Avoid Direct Sunlight: Sun can fade colors. Hang crafts away from direct light.
- Choose the Right Frame: Use frames that fit your craft’s size and style.
- Mat Your Work: Mats keep your craft away from the glass, which helps in preservation.
- Seal the Back: Make sure to seal the back of the frame to keep dust out.
- Use Clear Glass or Plexiglass: Protect your craft with clear and durable glass or Plexiglass.
By following these steps, your winter paper crafts can last longer and continue to bring joy. Whether they’re seasonal snowflakes or cozy lanterns, a little care goes a long way. Now, show off your crafts and let them brighten your winter days!