Introduction to Foam Paper
Foam paper, also known as foam sheets or craft foam, is a versatile material popular among craft enthusiasts. Its lightweight nature and ease of cutting make it ideal for a range of projects. From simple kid’s toys to intricate home decor, foam paper crafts can add a unique and colorful touch to any space. The material comes in a variety of colors, thicknesses, and sizes to suit every creative idea. Whether you are new to crafting or a seasoned pro, foam paper offers endless possibilities to express your creativity.
In the upcoming sections, we will discuss the essential tools and materials you need to start your foam paper crafting journey. We will also explore easy projects for beginners, advanced decor ideas, seasonal decorations, themed crafts for special occasions, and valuable tips for working with foam paper. Get ready to transform this simple material into stunning crafts that can enhance the appeal of your home decor.

Essential Tools and Materials for Foam Paper Crafting
To start with foam paper crafts, gathering the essential tools and materials is crucial. Regardless of the complexity of your project, certain items should be in your crafting kit. Here’s what you’ll need:
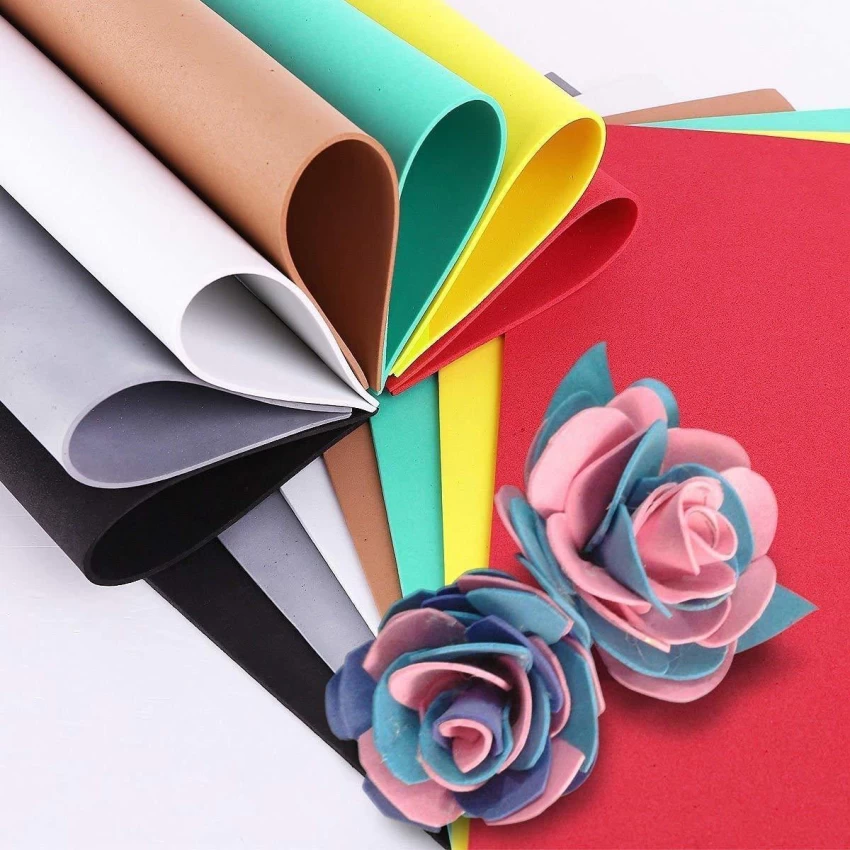
- Foam Sheets: The foundation of all foam paper crafts. They come in various colors and thicknesses.
- Cutting Tools: Sharp scissors or a craft knife will ensure clean cuts. Always use them with caution.
- Rulers and Cutting Mats: For precise measurements and to protect your work surface.
- Glue: A good-quality craft glue that works well with foam is vital.
- Markers and Paints: To add details and personalize your creations.
- Decorative Elements: Sequins, beads, or buttons can enhance your craft.
- Templates and Patterns: Helpful for tracing and cutting out specific shapes.
These items create a basic crafting toolkit. With these at hand, you can begin simple projects and gradually move to more intricate designs. Remember to work in a well-lit area and to keep your tools organized for a seamless crafting experience.
Foam paper is a forgiving material, allowing for easy corrections, which makes it perfect for beginners. So make sure you have all these essential tools and materials, and you are ready to embark on your foam paper crafting adventure.
Easy Foam Paper Projects for Beginners
Getting started with foam paper crafts is exciting and accessible for everyone, including beginners. Here are some easy yet delightful projects to kick off your crafting journey:
- Bookmarks: Cut foam paper into long rectangles. Decorate them with markers or glue on sequins.
- Door Hangers: Shape foam paper into a circle or any other form. Write a welcoming message or your name.
- Fridge Magnets: Make small foam shapes. Attach magnets to the back for a fun kitchen decor.
- Coasters: Create circles or squares. Use them to protect furniture from drink spills.
- Flower Bouquets: Stack different colors of foam. Cut them into flower shapes and combine them with wire stems.
- Picture Frames: Cut a frame shape. Decorate it with additional foam cutouts or paint.
These projects are not just easy, but they also require minimal tools and materials. They’re perfect as a starting point to practice your skills before moving on to more complex designs. Begin with basic shapes and as you gain confidence, you can start experimenting with more detailed cuts and decorations.
Each of the projects listed can result in functional items or beautiful decorations. They can serve as lovely personal gifts or even as items to sell at local craft fares. Most importantly, working on these crafts can bring a great sense of accomplishment and pleasure. Remember to use the essential tools and materials mentioned earlier to ensure your crafting process is enjoyable and the outcome, impressive. Happy crafting!
Advanced Foam Paper Decor Ideas for Your Home
Moving beyond the basics, you can use foam paper to craft stunning decor for your home. Here are some innovative ideas that will elevate your crafting to another level:
- Wall Art: Create a 3D wall piece by layering cut foam shapes. Build landscapes or abstract patterns.
- Lamp Shades: Customize a lampshade with cut-out foam designs that cast beautiful shadows.
- Decorative Wreaths: Fashion seasonal wreaths by attaching foam flowers and ribbons to a base ring.
- Mobiles: Hang cut foam figures from a wire frame to make playful mobiles perfect for nurseries.
- Cushion Appliques: Add a pop of color to plain cushions by gluing on foam shapes.
- Mantel Decor: Craft intricate foam scenes or monograms to display on your fireplace mantel.
These ideas showcase the versatility of foam paper crafts. With a little imagination and the right tools, you can transform foam sheets into chic decor. Use markers and paints to add detail and merge pieces with high-strength glue. Remember, when working with sharp tools and intricate designs, precision is key. Take your time crafting these advanced projects and soon, you’ll have custom decor pieces that reflect your personal style and creativity.

Seasonal Decorations Using Foam Paper
Foam paper’s versatility shines when creating seasonal decorations. Here’s how you can make festive decor for every season using foam paper crafts:
- Spring: Make vibrant flowers and butterflies to welcome the new beginnings of spring. Decorate with pastel foam sheets.
- Summer: Create bright suns, flip-flops or sea creatures for a summer vibe. Use bold and warm colors.
- Fall: Fashion fall leaves, pumpkins, or acorns using the rich oranges and browns of autumn.
- Winter: Craft snowflakes, Christmas ornaments, or a New Year’s banner. Choose white, blue, or glitter foam sheets.
These crafts can accent your home with the right seasonal touch. Foam paper allows for easy customization, so mix and match colors and designs to suit your space. Simple shapes like leaves or snowflakes are perfect for stringing together into garlands. More complex shapes like pumpkins can become centerpieces. Use the essential tools mentioned earlier to cut precise shapes and details. With foam paper, you can easily create decorations that are both beautiful and durable, lasting throughout the season. Start with a simple project and expand as your skills grow. Remember to enjoy the process as you craft your way through the year’s seasons.
Themed Foam Paper Crafts for Special Occasions
Creating themed foam paper crafts can bring an extra touch of cheer to any special occasion. Making these crafts is a great way to personalize your celebrations and give them a unique flair. Let’s explore some craft ideas for different events:
- Birthdays: Design custom party hats or banners. Use bright foam sheets to match the party theme.
- Weddings: Craft intricate place cards or favor boxes. Choose foam colors that complement the wedding palette.
- Halloween: Make spooky decorations like bats, ghosts, or pumpkins. Use black, orange, and purple foam sheets.
- Christmas: Create ornaments, gift tags, or nativity scenes. Go for red, green, or gold foam.
- Valentine’s Day: Shape hearts or cupid figures to spread the love. Pink and red foam sheets work well.
- Easter: Cut out bunnies, eggs, or baskets. Pastel-colored foam is perfect for this spring holiday.
These crafts add a personal touch to each special occasion. Use the tools listed earlier for precise cutting and detailed decorating. Reach for glue, markers, and additional embellishments to enhance your themed crafts. With these decorations, your special occasions will be more vibrant and memorable. Remember, the key is to have fun while crafting and to let your creativity shine.
Tips for Working with Foam Paper
When creating foam paper crafts, following some practical tips can make your work easier and more enjoyable. Here are some insights to improve your crafting experience with foam paper:
- Start Simple: Begin with uncomplicated projects. Ease into the craft with basic shapes before tackling more complex designs.
- Sharp Tools: Ensure your cutting tools are sharp. Dull blades can tear foam paper, ruining your project.
- Trace First: Always trace your designs onto the foam paper before cutting. This step prevents mistakes and saves materials.
- Thin Layers: If gluing layers, apply a thin layer of craft glue. Too much glue can make the paper warp.
- Test Pieces: Experiment on scrap foam first. Test your paint, markers, and glue to avoid ruining your main piece.
- Patience with Paint: Allow paint to dry thoroughly before handling. Wet paint can smudge and spoil your hard work.
- Bend Don’t Force: Gently bend foam paper into shape to avoid creases. Avoid stretching or forcing it into position.
By keeping these tips in mind, you’ll ensure that your foam paper crafts turn out beautifully and last longer. As you work, remember that practice makes perfect. With each project, you’ll gain more confidence and skills in working with this versatile material.
Showcasing Your Foam Paper Crafts
After mastering foam paper craft techniques and completing several projects, it’s time to display them. Here are some tips for showcasing your foam paper crafts effectively:
- Choose the Right Location: Pick a spot where your crafts can be seen. A shelf or wall space works well.
- Good Lighting: Ensure your crafts are well-lit to highlight their colors and details.
- Group by Theme: Arrange crafts by theme or color to create a visual impact.
- Rotation: Change up your displays with the seasons or occasions to keep things fresh.
- Use Stands: For stability and better viewing angles, use small stands or easels.
- Avoid Clutter: Don’t crowd your crafts. Spread them out to prevent a cluttered look.
- Dust Regularly: Keep your crafts clean so they always look their best.
- Photograph Them: Take pictures of your crafts to share online or keep as memories.
- Involve Others: Encourage family and friends to take part in crafting and displaying.
Presenting your foam paper crafts is just as important as making them. It allows you to enjoy your work and share your creativity with others. Use these tips to enhance your decor and showcase your crafting skills. Happy displaying!