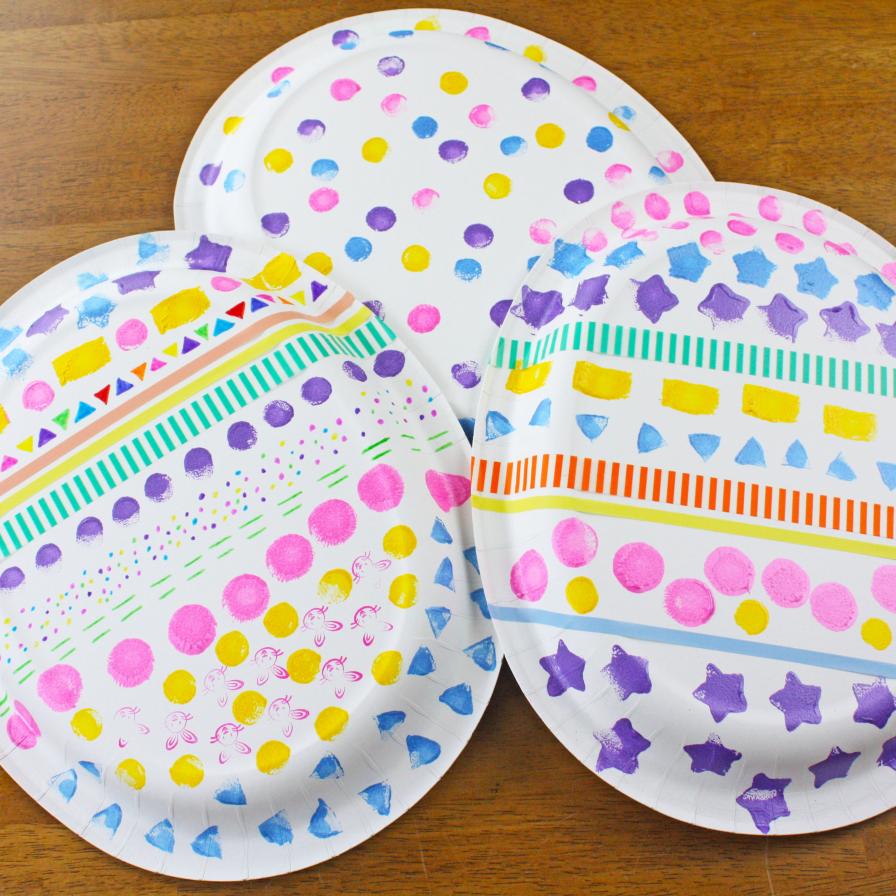
Introduction to Paper Plate Crafts for Easter
When Easter rolls around, families look for fun, creative activities to celebrate. Paper plate Easter crafts are an ideal way to engage children in the festive spirit. These crafts are not only adorable and memorable, but they’re also affordable and easy to make. Using paper plates as a base, you can create a variety of Easter-themed art projects that kids will love.
Paper plates are versatile, making them a perfect fit for various Easter designs. From fluffy Easter bunnies to colorful egg baskets, there’s no limit to what you can make. These crafts require simple materials like scissors, glue, paint, and markers, which you might already have at home. Their flexibility allows for a range of complexity – simple crafts for younger kids and more intricate projects for older children.
Engaging in paper plate Easter crafts is also an excellent opportunity for kids to develop their fine motor skills and express their creativity. Whether painting, cutting, or pasting, every step encourages them to learn and experiment.
In the following sections, we’ll explore some delightful paper plate Easter crafts that are perfect for kids of all ages. Get ready to transform plain paper plates into charming Easter creations!
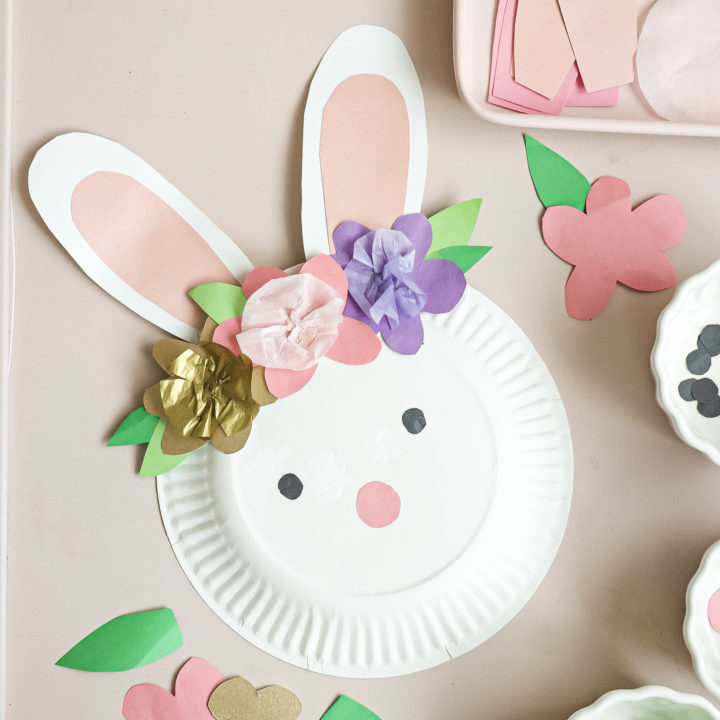
Easy Easter Bunny Paper Plate Craft
Let’s hop into crafting with an easy Easter bunny paper plate craft! Here’s how parents and kids can quickly create a charming bunny using simple supplies.
- Gather your materials: You’ll need a paper plate, white paint, pink felt, a pom-pom, googly eyes, scissors, and glue.
- Paint the plate: Coat the paper plate with white paint and wait for it to dry completely.
- Cut bunny ears: Snip out two ear shapes from the remaining parts of the paper plate.
- Decorate the ears: Cut pink felt to fit inside the ear shapes and glue them in place.
- Assemble the face: Attach two googly eyes to the painted plate to form the bunny’s eyes.
- Add a nose: Stick a pom-pom in the center to serve as the bunny’s nose.
- Whiskers and mouth: Use a marker to draw fine whiskers and a smiling mouth.
- Final touches: Glue the ears to the top of the backside of the plate.
With these simple steps, your child will have created their own paper plate easter craft bunny. Kids will beam with pride seeing their handmade bunnies. This activity is perfect for young children as it’s not only fun but also offers the joy of play and learning.
Colorful Paper Plate Easter Egg Baskets
Transforming a plain paper plate into a vibrant Easter egg basket is a delightful project for kids. Here’s a step-by-step guide to help you and your little ones craft the perfect basket for Easter.
- Choose your colors: Have your child pick out their favorite paint colors to decorate the plate.
- Paint the base: Let the kids paint the entire paper plate. Ensure it dries completely.
- Cut the plate: Once dry, cut the plate in half.
- Form the basket: Use one half as the basket’s base. Attach strips of the other half to form a handle.
- Decorate: Encourage children to add stickers, glitter, or drawn designs to their baskets.
- Add Easter grass: Place some Easter grass inside the basket to hold the eggs.
- Fill with eggs: Put in chocolate eggs, candies, or small toys.
- Display or use for egg hunts: Kids can showcase their baskets or use them in egg hunts.
These paper plate Easter egg baskets are not just fun to make but also serve as great Easter decor or a playful element during egg hunts. Children enjoy the process, from painting to filling the basket with goodies, and it gives them a sense of accomplishment to use something they handcrafted. Keep the steps straightforward and the atmosphere playful for an enjoyable crafting experience.
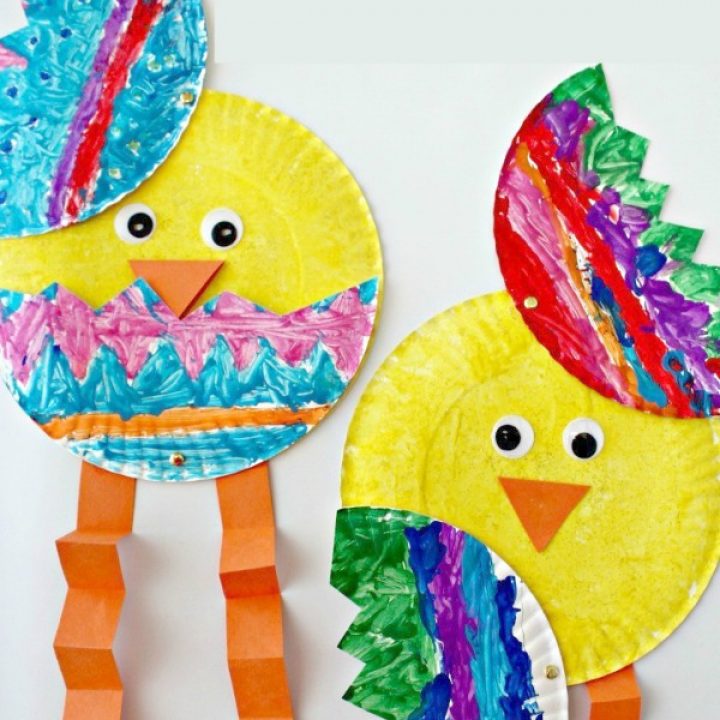
Hatching Chick Paper Plate Craft
Bring the cute factor to Easter with this adorable hatching chick paper plate craft that kids will love to make. This craft is not only super simple but also incredibly enjoyable for children and helps bring out their creativity. Here’s a straightforward guide to making these cute chicks come to life with a few common craft supplies.
- Get your crafting materials ready: You’ll need a paper plate, yellow paint, orange paper, googly eyes, scissors, and glue.
- Paint the plate yellow: Cover the plate with yellow paint to represent the chick and wait for it to dry completely.
- Cut the plate: Once the paint is dry, cut the paper plate in half to create a cracked egg effect.
- Make the chick: From the other half, cut out a round shape for the chick’s body and two wings.
- Create the beak: Cut a small triangle from the orange paper for the chick’s beak.
- Assemble the parts: Glue the chick’s body to the bottom piece of the cracked plate. Add the beak and googly eyes.
- Attach the wings: Place the wings on either side of the chick’s body with glue.
- Complete the craft: Position the top half of the plate above the chick to look like a cracked eggshell.
Children will be thrilled to see their paper plate transform into a hatching Easter chick. It’s a delightful craft that encourages them to get involved in the Easter celebrations while also developing their artistic skills. With each step being child-friendly, this paper plate easter craft ensures maximum engagement and creative enjoyment.
Easter Scene Paper Plate Art
Creating an Easter scene on a paper plate is a fantastic way to celebrate the holiday. This art project can be as simple or as intricate as desired, making it perfect for kids of all ages. Here’s what you need to do to help your child bring an Easter scene to life on a paper plate.
- Collect materials: You’ll need paper plates, paints, colorful paper, glue, and markers.
- Plan your scene: Decide on an Easter scene. It could be a garden, a farm, or an Easter morning landscape.
- Paint the background: Start by painting the base color for the scene. Bright, Easter colors work best.
- Create elements: Cut out shapes from colored paper. Think Easter eggs, flowers, animals, and baskets.
- Assemble the scene: Glue the paper shapes onto the plate. Add details with markers.
- Dry and display: Let the craft dry thoroughly. Then, display it for everyone to see.
This paper plate Easter craft encourages kids to use their imagination and create a scene that’s unique to their vision. Whether it features bunnies hopping in a field, or a colorful display of Easter eggs, the end result is sure to be a proud moment for every young artist. Keep the focus on fun and creativity, making sure the atmosphere is as colorful as the craft itself.
Adorable Paper Plate Sheep for Easter
Create an adorable paper plate sheep with your kids this Easter for a fluffy addition to your crafts. Follow these simple steps to make a cute sheep:
- Gather Supplies: You need a paper plate, cotton balls, black paper, and glue.
- Cover with cotton: Glue cotton balls all over the plate to make the sheep’s woolly body.
- Cut out face and legs: From black paper, cut out a sheep face and legs.
- Attach the face and legs: Stick the face on the edge of the plate. Glue legs at the base.
- Add details: Use a white marker to draw eyes and a nose on the face.
- Let it dry: Make sure all glued parts are dry before handling your sheep craft.
Children will love creating their paper plate easter craft sheep. It’s perfect for decorating their rooms or for Easter displays. With each step, kids can enjoy the simplicity and joy of crafting. This activity is great for all ages to take part in the Easter fun. Keep the process light and lively, and watch the kids beam with pride at their handmade sheep.
DIY Paper Plate Easter Wreath
Creating a DIY paper plate Easter wreath is a splendid activity that combines creativity and festivity. Here is how you and your kids can craft a delightful wreath to celebrate Easter.
- Collect supplies: You’ll need a paper plate, colorful paper, scissors, glue, and ribbon.
- Prepare the plate: Cut the center out of the paper plate, leaving a ring as your wreath base.
- Cut paper shapes: Use the colorful paper to cut out Easter egg, bunny, and flower shapes.
- Decorate the wreath: Arrange and glue the paper shapes around the paper plate ring.
- Add a ribbon: Tie a ribbon into a bow and attach it to the top of the wreath for hanging.
- Display your wreath: Hang the wreath on a door or wall to add a touch of Easter to your home.
This paper plate Easter craft is perfect for getting kids into the holiday spirit. It’s easy to customize with different colors and patterns, letting children’s creativity shine. Kids will love seeing their handmade wreaths adorning the home. Remember to keep the steps simple and the atmosphere filled with joy as you craft together.
Tips for Crafting with Kids During Easter
Easter crafting can be a fantastic bonding experience. Here are some helpful tips to ensure an enjoyable time for everyone involved:
- Plan Ahead: Decide on the crafts beforehand and have all supplies ready.
- Keep it Simple: Choose crafts like paper plate easter crafts that are easy for kids to manage.
- Encourage Creativity: Allow kids to use their imagination with colors and decorations.
- Stay Safe: Keep safety scissors and non-toxic glue on hand to prevent accidents.
- Guide Them: Be ready to help, but let the kids take charge of their creations.
- Embrace the Mess: Crafting can get messy, so prepare the space and don’t stress about spills.
- Take Breaks: If a child is feeling overwhelmed, it’s okay to pause and resume later.
- Praise Their Work: Positive reinforcement will make the experience more rewarding for them.
- Make Memories: Take pictures of the children with their crafts to cherish the moment.
- Have Fun: The goal is to enjoy the process, not just the final product.
By following these simple tips, Easter crafting with paper plate easter crafts will be a hit. Young ones will create not just art, but lasting memories, too.