Essential Tools and Materials for Paper Crafting
Before diving into the vast sea of paper crafting, one must gather the appropriate tools and materials. Start with the basics. First, a variety of paper is crucial. Stock up on different colors, textures, and weights. Cardstock, construction paper, and patterned paper are great starters. You’ll find that certain crafts to make with paper require specific paper types.
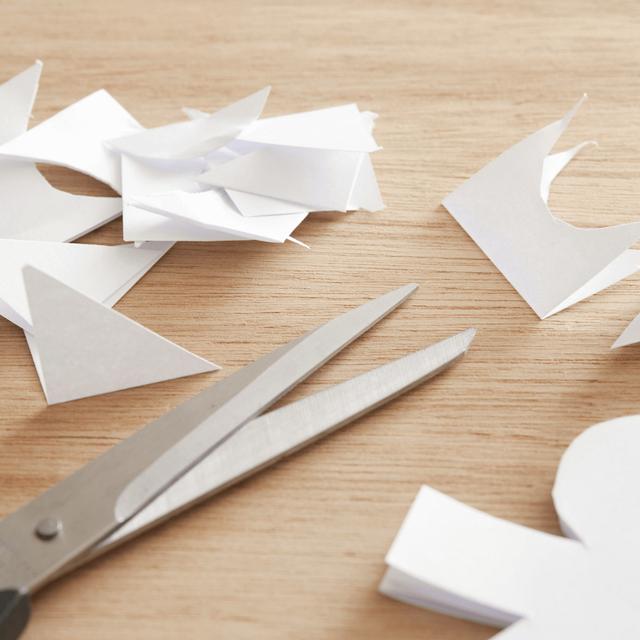
A good pair of scissors is your next must-have. Invest in a pair that is sharp and comfortable to hold for precise cuts. Another vital tool is a craft knife. It allows for detailed cutting that scissors can’t achieve. Use a cutting mat with it to protect your surfaces.
Adhesives come next. Have on hand a glue stick, double-sided tape, and liquid glue. They each have different uses for various paper craft projects. A bone folder is also handy. It helps create crisp folds and smooth edges.
Don’t forget a ruler for straight lines and measurements. Clear acrylic blocks and stamps are perfect for adding embellishments. And markers or pens in multiple colors will brighten up your creations.
For more intricate designs, consider getting a scoring board and punch boards. They help in making uniform folds and shapes. And if you love textures, embossing tools and stencils are perfect for adding depth.
For those interested in crafts to make with paper that include fine details, tweezers and a magnifying glass can be very helpful. Lastly, for storage, opt for containers and organizers. Keep your paper and tools tidy and in good condition for the next crafting session.

Beginner-Friendly Paper Craft Ideas
Starting with paper crafting doesn’t have to be daunting. Here are some beginner-friendly crafts to make with paper, which guarantee fun and impressive results. Grab your tools, and let’s get creative.
- Paper Greeting Cards: Show someone you care with a handmade card. Pick colorful cardstock, use stamps for decorations, and write a personal message inside.
- Bookmarks: Create unique bookmarks using scraps of patterned paper or cardstock. Cut them into fun shapes and decorate as you wish.
- Paper Chains: An excellent project for kids and adults alike. Cut strips of colorful paper and loop them into interlocking rings. These chains can brighten up any room.
- Origami: Start with simple origami projects like cranes or boats. You only need square pieces of paper and some folding skills.
- Paper Photo Frames: Craft custom frames for your favorite photos. Decorate them with stickers or personalized designs made with your markers.
Remember, these paper craft projects are just the beginning. They provide a solid foundation to explore more complex techniques later on. Enjoy the process and see where your creativity can take you!
Step-by-Step Guide to Making Paper Flowers
Paper flowers are a beautiful and lasting addition to any DIY project. Here’s a simple guide to help you get started with crafts to make with paper that bloom.
- Choose Your Paper: Begin with selecting colorful, lightweight paper like crepe or tissue paper. It’s flexible and easier to shape.
- Cut Out Petal Shapes: Draw and cut out petal shapes of various sizes. You will stack these to form the layers of your flower.
- Create the Stem: Use a thin wire or a skewer as the stem. Wrap it with floral tape or green paper for a realistic look.
- Assemble the Petals: Start with the smaller petals. Attach them around the top of the stem using double-sided tape or glue.
- Shape the Petals: Gently curl or twist each petal to make them look natural. A pencil can help with curling.
- Add More Layers: Continue adding larger petals, arranging them around the stem. Secure each layer before adding the next.
- Finish with Leaves: Cut out leaf shapes and attach them to the stem. Place them strategically for a natural appearance.
Making paper flowers is a delightful process. Take your time to perfect each stage. With practice, you’ll craft stunning paper bouquets that never wilt. Remember to keep your tools within arm’s reach and have fun experimenting with different colors and sizes!
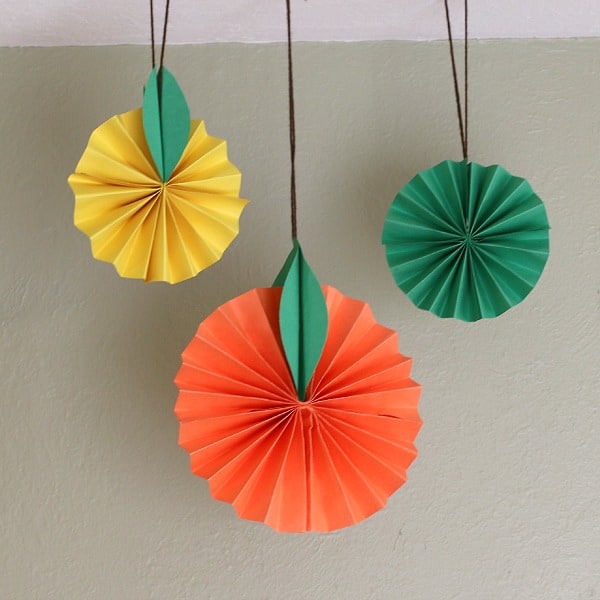
Techniques for Creating 3D Paper Crafts
Moving beyond flat paper projects, 3D paper crafts offer a delightful challenge. Here are techniques to help you create stunning three-dimensional crafts to make with paper.
- Layering: Cut out multiple shapes of the same object. Stack and glue them from largest to smallest to create a 3D effect.
- Folding: Master the art of folding with techniques like pleating or fan folding. This adds volume to your paper crafts.
- Rolling: Create tubes by rolling strips of paper tightly. These can form the stems of flowers or structural elements.
- Sculpting: Soften paper by crumpling and then smoothing it. Shape it into three-dimensional forms such as animals or figures.
Use lightweight cardstock or construction paper for these projects. These papers are sturdy yet easy enough to manipulate. Always use sharp tools for precise cuts, and take your time to perfect each element. Combine these techniques to build intricate designs. Whether crafting a small paper animal or an elaborate paper sculpture, patience and practice will lead to impressive results.
Eco-Friendly Paper Craft Projects: Repurposing and Recycling
In the spirit of sustainability, discover eco-friendly crafts to make with paper that also save the planet. Upcycling and recycling play a key role here. Reduce waste and get creative with these simple ideas:
- Recycled Paper Beads: Turn old magazines or newspapers into colorful beads. Cut strips, roll them tightly around a skewer, and seal with glue.
- Paper Mache Bowls: Use a mixture of water and flour to create a paste. Dip strips of recycled paper in and cover a balloon. Once dry, pop the balloon for a unique bowl.
- Seed Paper Gifts: Create seed-embedded paper that can be planted. Mix paper pulp with seeds, press flat, and dry. Gift them as eco-friendly cards that grow into plants.
- Cardboard Organizers: Cut up old boxes to craft desk organizers or storage bins. Decorate them with leftover scraps of paper.
- Newspaper Baskets: Weave folded newspaper strips into a basket. Strengthen with glue and use it to store items attractively.
- Envelope Scrapbook: Collect used envelopes and glue them into a scrapbook. Fill with photos and memories for a personal touch.
Not only does repurposing old paper help the environment, but it also sparks innovation and originality in your projects. Always keep an eye out for paper items to reuse. With a bit of imagination, even the most mundane materials can be transformed into beautiful and functional crafts.
Paper Crafting for Special Occasions: Cards, Invitations, and Decorations
Special occasions call for a personal touch. Paper crafting lends itself wonderfully to creating custom cards, invitations, and decorations. With crafts to make with paper, you can add a unique and heartfelt element to any event. Here’s how to get started on artful creations for your next special occasion.
Personalized Greeting Cards: Make a card as unique as the person you’re giving it to. Choose a color theme, add textures, and consider 3D elements.
Handcrafted Invitations: Impress guests with invitations you make yourself. Use stamps for elegant details and add ribbons or embossing for a deluxe feel.
Custom Decorations: Create banners, table centerpieces, or hanging ornaments. Craft these in advance to add a special flair to your venue.
Remember, the key to success with special occasion paper crafts is planning. Think about your theme, your colors, and how much time you have. Keep your designs simple but thoughtful. With your collection of tools and techniques, you’re ready to make memorable paper crafts for any event.
Advanced Paper Craft Techniques: Quilling and Origami
For those ready to take paper crafting to the next level, quilling and origami are ideal techniques. These advanced crafts to make with paper require precision and patience but offer rewarding results.
Quilling
Quilling involves rolling thin strips of paper into coils or scrolls. These are then shaped and glued together to form delicate designs. Start with basic shapes like loose coils and marquises. Work up to more complex designs like flowers or intricate patterns. A quilling tool helps to wind the paper tightly. Gradually, you can create stunning artwork perfect for gift cards or wall art.
Origami
Origami is the traditional Japanese art of paper folding. Unlike quilling, no glue is needed. Begin with simple models like the classic crane or a paper box. As skills improve, try more complex figures like dragons or intricate flowers. Precise folding is key to making clean, sharp creases. Use thin, square sheets of paper for best results. Both quilling and origami can be very meditative and provide a sense of accomplishment.
Whether you choose quilling or origami, these advanced paper craft techniques will challenge and enhance your crafting repertoire. They both allow deep creativity and can be adapted to various themes and occasions. Enjoy exploring these art forms and watch your paper projects come to life with added dimension and sophistication.
Tips for Organizing and Storing Your Paper Craft Supplies
Creating crafts to make with paper is an enjoyable hobby that can quickly turn into a passion. But with passion comes an assortment of supplies that can get out of hand if not organized properly. To keep your crafting area neat and your supplies in good condition, here are some beneficial tips for storage and organization:
- Label Everything: Use labels on boxes and bins. This helps you find items fast.
- Clear Storage Bins: Opt for transparent bins to easily see inside. This saves time when searching for supplies.
- Vertical Space: Make use of walls or doors. Hang organizers or pegboards to free up desk space.
- Sort by Project: Group materials for specific projects together. It will make starting new projects easier.
- Use Dividers: Drawer dividers keep small items like stamps and beads tidy.
- Regular Decluttering: Sort through your supplies often. Get rid of items you no longer use.
- Repurpose Items: Old jars or mugs can hold pens and tools. This adds character to your space.
- Invest in a Cart: A rolling cart can store items you use often. It can be moved around as you work.
Remember, a well-organized crafting space is key to a smooth and enjoyable crafting experience. With everything in its place, you’ll spend less time searching for supplies and more time indulging in the crafts to make with paper that you love.