Introduction to Christmas Paper Crafts
Christmas is a season of joy, warmth, and creativity. While decorations and gifts often take center stage, crafting can add a personal touch to the festivities. Among the various activities, Christmas paper crafts are a favorite for many. These crafts are not only enjoyable but also easily customizable. A ‘step by step christmas paper crafts’ tutorial can guide you through creating unique and festive decorations. These crafts are ideal for everyone, from crafting novices to seasoned artists. Plus, they are a perfect way to bond with family and friends. In this blog, we set out to explore various Christmas paper crafts that you can start today. From simple cutouts to intricate designs, step by step, we will help you transform paper into holiday magic. Grab your scissors, folding papers, and let’s get crafting!
Choosing the Right Materials for Your Paper Crafts
Before diving into our ‘step by step christmas paper crafts’, selecting the right materials is crucial. Quality materials ensure your crafts look good and last throughout the holiday season. Here are some essentials to gather:
- High-quality Paper: Choose sturdy construction paper or cardstock for your projects. Festive colors like red, green, and gold add to the Christmas spirit.
- Scissors: A sharp pair of scissors is key for precise cuts. Safety scissors are great for kids joining in.
- Glue and Tape: Adhesive is important for assembling your crafts. Stick glue, double-sided tape, or a glue gun can be handy tools.
- Embellishments: Add sparkle with glitter, sequins, buttons, or ribbons. These small details can bring life to your creations.
- Markers and Pens: Use these to add personal messages or additional details to your crafts.
- Ruler and Cutting Mat: These tools help you make straight cuts and protect surfaces when trimming paper.
By gathering these materials, you set the stage for a successful crafting experience. And remember, you can always adapt and use recyclable materials to add a sustainable touch to your creations. Let’s get ready to cut, fold, and decorate!
Simple Paper Snowflakes
Making paper snowflakes is a classic Christmas paper craft that delights all ages. This section gives you a step by step guide to create your snowy wonders with ease.
Step 1: Choose your Paper
Select a square piece of high-quality white paper. Thin yet robust paper works best for detailed cuts.
Step 2: Fold the Paper
Fold your paper diagonally to form a triangle. Fold it in half again, repeating until you achieve a smaller triangle shape.
Step 3: Design Cutting Lines
Draw your design with a pencil. Plan where you will make cuts to form patterns.
Step 4: Cut along the Lines
Carefully trim along the drawn lines with your scissors. Be careful not to cut all the way through the folded edges.
Step 5: Unfold Your Snowflake
Gently unfold your snowflake to reveal the intricate patterns. Flatten it under a book for best results.
Step 6: Add Embellishments
Use glitter or markers to add sparkle and color if you wish. Remember, every snowflake is unique. Don’t worry about making them perfect.
Follow these steps, and you will fill your home with the magic of paper snowflakes. With practice, you can craft more complex designs. Have fun mixing sizes and patterns to create a winter wonderland.
Festive Paper Wreath Creation
Transforming paper into a delightful Christmas wreath adds a festive flair to your decor. Here’s how you can create a paper wreath with ease.
Step 1: Gather Your Supplies
You will need green paper, a pencil, scissors, and glue. Optionally, gather red ribbons or other embellishments.
Step 2: Cut the Paper
Cut the green paper into long strips. These will form the wreath’s foliage.
Step 3: Make Leaf Shapes
Fold the strips in half lengthwise and cut them into leaf shapes.
Step 4: Create the Wreath Base
Cut a donut shape from cardboard as the base. This will support your paper leaves.
Step 5: Attach the Leaves
Start gluing the paper leaves onto the base. Overlap them for a full look.
Step 6: Add Decorative Elements
Decorate with ribbons, berries, or small ornaments for a festive touch.
Step 7: Display Your Wreath
Hang the wreath on your door or wall. Admire your handmade Christmas decoration.
Follow these steps to create a paper wreath that brightens your holiday season. With some simple folding and cutting, you’ll have a craft that brings cheer to any space.
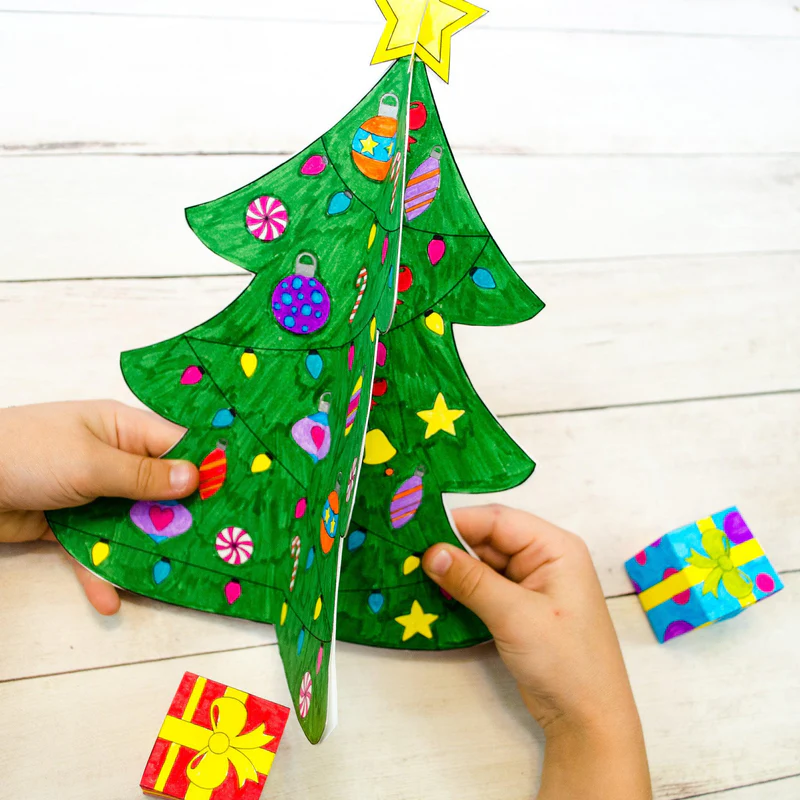
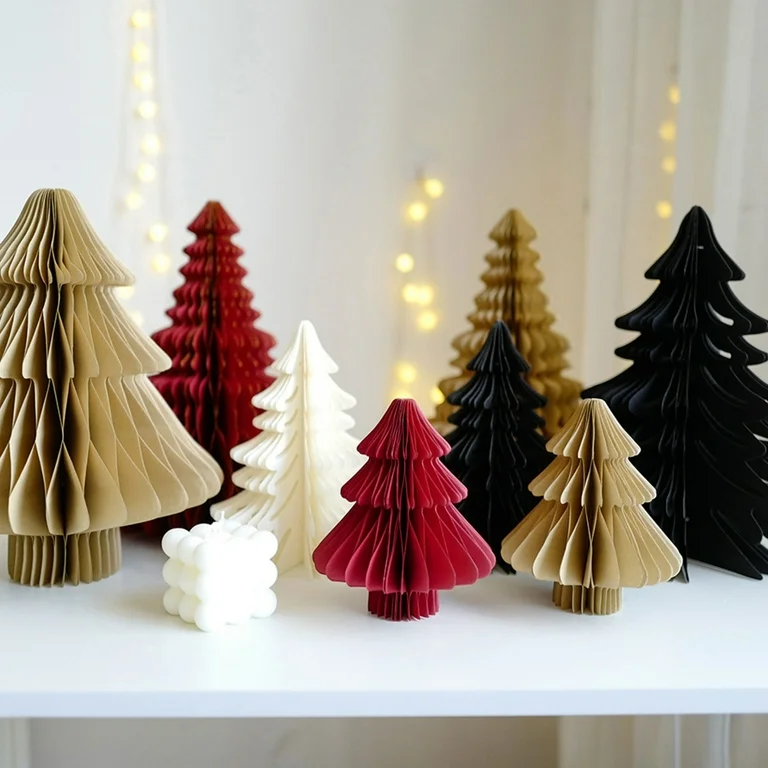
3D Paper Christmas Tree Projects
3D paper Christmas tree projects add charm and wonder to your holiday decor. Follow this step by step guide to create your three-dimensional masterpiece.
Step 1: Select Your Paper
Choose stiff cardstock or construction paper in green or your chosen color. Texture can enhance the look.
Step 2: Cut into Shapes
Cut two identical tree shapes. Use a template for symmetry. The size can vary depending on your preference.
Step 3: Slit the Trees
Make a vertical slit halfway up on one tree, and halfway down on the other. This helps interlock the pieces.
Step 4: Interlock the Trees
Slide the trees together at the slits to form a standing 3D figure.
Step 5: Decorate Your Tree
Glue on sequins, glitter, or use markers for ornaments. Wrap a small ribbon as a tinsel.
Step 6: Create a Base
Cut a small circle to stabilize your tree. Attach it to the bottom with glue or tape.
Step 7: Display with Pride
Place your 3D paper Christmas tree on tables, shelves, or as a centerpiece.
By following these steps, you’ll create an enchanting 3D Christmas tree that will be the highlight of your paper crafts this season. Remember to keep steps simple and have fun with decorations. Happy crafting!
DIY Christmas Paper Ornaments
Christmas is the perfect time to get creative and DIY Christmas paper ornaments are a joyful addition to your festive decorations. This step by step guide will help you craft beautiful ornaments from paper, step by step, to hang on your Christmas tree or around your home.
Step 1: Choose Your Paper
Opt for colorful or patterned paper that matches your Christmas theme. Cardstock is durable and ideal for ornaments.
Step 2: Decide on the Shapes
Select shapes like stars, bells, or balls. You can use cookie cutters as templates for tracing.
Step 3: Cut Out the Shapes
After tracing your shapes onto the paper, use sharp scissors to cut them out accurately.
Step 4: Add Details
With markers, draw details or use a hole punch to create patterns on your cutouts.
Step 5: Fold and Glue
If making 3D ornaments, fold shapes down the middle and glue the sides together for volume.
Step 6: Attach String or Ribbon
Use a needle to thread a string through the top of the ornament. Secure it with a knot.
Step 7: Embellish Your Ornament
Add final touches like glitter, beads, or sequins to make your ornaments sparkle.
Step 8: Hang and Enjoy
Tie your ornaments onto your Christmas tree or any spot that could use some holiday cheer.
By following these simple steps, you’ll create lovely DIY Christmas paper ornaments that will shine throughout the holiday season. Remember, the beauty of creating step by step christmas paper crafts lies in the unique touch you bring to each piece.
Handmade Christmas Cards and Gift Tags
Personal touches make the holiday season special, and handmade Christmas cards and gift tags are the perfect way to express your care. Follow this easy guide to create your custom greetings and tags.
Step 1: Select Your Cardstock
For your cards and tags, pick cardstock in festive colors. Ensure it’s stiff enough to hold shape.
Step 2: Cut to Size
Trim the cardstock to your desired size for cards and tags. Use a ruler for straight edges.
Step 3: Design Your Cards/Tags
Sketch your design lightly with pencil. Think festive symbols like trees, stars, or snowmen.
Step 4: Decorate with Care
Use markers, stickers, or stamps to add color and depth to your designs. Let creativity flow.
Step 5: Write Personal Messages
On cards, pen down heartfelt wishes. For tags, write the recipient’s name or a short message.
Step 6: Attach to Gifts
Punch a hole at the top of each tag. Thread ribbon through it and tie to your gifts.
Step 7: Add Finishing Touches
Glue on ribbons or small embellishments to make your cards and tags stand out.
With these seven simple steps, your handmade Christmas cards and gift tags will add a memorable touch to your holiday gifting. Plus, crafting them step by step can be a joyful activity to share with loved ones.
Tips for Successful Christmas Paper Crafting Activities
Achieving success in your Christmas paper crafting doesn’t just hinge on following step by step guides; certain tips can make the process smoother. Here are some essential pointers to keep in mind.
- Start Simple: If you’re new to paper crafting, begin with easy projects. Simple snowflakes or paper chains build confidence.
- Organize Your Space: Keep your workspace clean and materials within reach. This saves time and minimizes mess.
- Be Patient: Some crafts require finesse and patience, especially when folding or cutting the paper. Take breaks if needed.
- Get Creative with Colors: Don’t limit yourself to traditional Christmas colors. Experiment with different shades and combinations.
- Involve Others: Crafting is more fun with friends or family. It also speeds up the process and fosters bonding.
- Reuse and Recycle: Be eco-friendly. Use old wrapping paper or magazines for an interesting twist.
- Test Designs First: Try your ideas on scratch paper. This avoids wasting your good paper on mistakes.
- Step by Step Photos: Take photos of your crafting process. This can help if you need to pause or repeat a project.
Remember, the joy of step by step christmas paper crafts is as much in the creation as it is in the final display. Keep these tips in mind to enhance your crafting experience. Happy crafting!
Conclusion: Wrapping Up Your Holiday Creations
As we wrap up our step by step christmas paper crafts journey, it’s time to reflect on the creations we’ve made. These crafts have not just been about making decorations but also about creating memories and spreading holiday cheer. Remember, the value is in the personal touch you’ve added to each piece.
- Celebrate Your Efforts: Take a moment to enjoy your hand-crafted decorations. Each one is unique and a true representation of your creativity.
- Share the Joy: Don’t keep your crafts to yourself. Share them with family and friends. They make for thoughtful gifts and festive decor.
- Display with Pride: Hang your paper crafts where they can be admired. Whether it’s a snowflake in the window or an ornament on the tree, let them shine.
- Recycle and Store: After the holidays, carefully store reusable crafts for next year or recycle the materials.
- Spread the Word: Encourage others to try these fun projects. Crafting together makes for a warm and wonderful holiday tradition.
Remember, the simple act of folding, cutting, and gluing paper has the power to transform your space and make the holiday season even more magical. Keep these crafts close to your heart and let them remind you of the joy that hands-on creativity can bring. Happy holidays and happy crafting!