Easy Tissue Paper Pompoms
Tissue paper crafts for kids are not only fun but also simple to make. Easy tissue paper pompoms can brighten up any room or event. They are fluffy, colorful, and a joy for kids to create. This craft activity allows children to work with their hands and enjoy the beauty of colors. With some tissue paper and a few twists and ties, you can create these playful decorations. Let’s dive into making them with these steps.
Step-by-Step Guide to Making Pompoms
- Choose Colors: Let kids pick their favorite tissue paper colors. Mixing colors makes it more fun.
- Layer Sheets: Stack 8-10 sheets of tissue paper on top of each other.
- Fold Paper: Accordion-fold the stack in 1-inch sections. Make sharp creases.
- Secure Center: Tie a string or wire around the middle of the folded paper. This is the pompom’s core.
- Trim Ends: Cut the ends of the paper into rounded shapes for softer pompoms or pointy ends for a spiky effect.
- Fan Out: Carefully spread out the folds on either side of the center tie.
- Fluff Layers: Separate each layer, pulling gently towards the center tie. This step gives the pompom volume.
- Hang or Display: Attach a string to hang your pompom or place it as a centerpiece.
Creative Uses for Tissue Paper Pompoms
Once your tissue paper pompoms are ready, it’s time to be creative with them. Here are some ideas:
- Party Decor: Tissue paper pompoms make great decorations for birthdays or celebrations.
- Room Accents: Hang them in your child’s room for a splash of color.
- Gift Toppers: Use smaller pompoms to add flair to gift wrapping.
- Seasonal Decor: Make them in seasonal colors for holidays and special occasions.
The beauty of tissue paper crafts for kids is their versatility. You can adapt the size, color, and use of the pompoms to fit any theme or occasion. Let your kids’ imagination run wild as they explore the many possibilities of tissue paper pompoms.
Colorful Tissue Paper Flowers
Creating tissue paper flowers is a delightful project for kids and adults alike. These blossoms bring vibrancy and a touch of nature into any space without the worry of wilting. With a little bit of folding, cutting, and twisting, anyone can transform simple tissue paper into beautiful floral displays. Let’s start by gathering the necessary materials.
Materials You’ll Need for Tissue Paper Flowers
To craft your own tissue paper flowers, you’ll need:
- Colorful Tissue Paper: Choose various colors to make an array of flower types.
- Scissors: For shaping the petals and leaves accurately.
- Floral Wire or Pipe Cleaners: These will serve as stems and help hold the flower together.
- Craft Glue: A small dab can secure the petals and keep the structure intact.
- Ruler (optional): Useful for measuring and keeping petal sizes consistent.
Make sure all materials are ready and accessible to keep the craft session enjoyable and stress-free for the kids.
Crafting Techniques for Different Flower Types
Different flowers require varied crafting techniques. Here are some simple methods:
- Roses: Spiral-cut a circle of tissue paper and roll it into a rose shape, securing the base with floral wire.
- Daisies: Cut out several pointed oval petals and attach them in a circle around a button-shaped center.
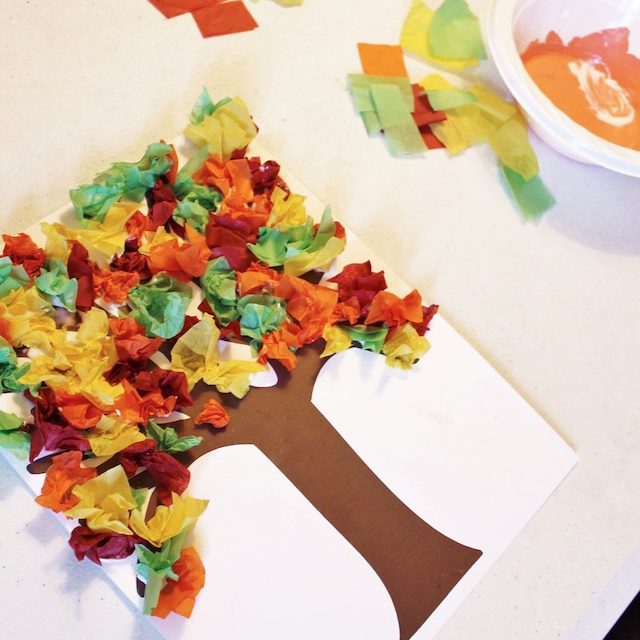
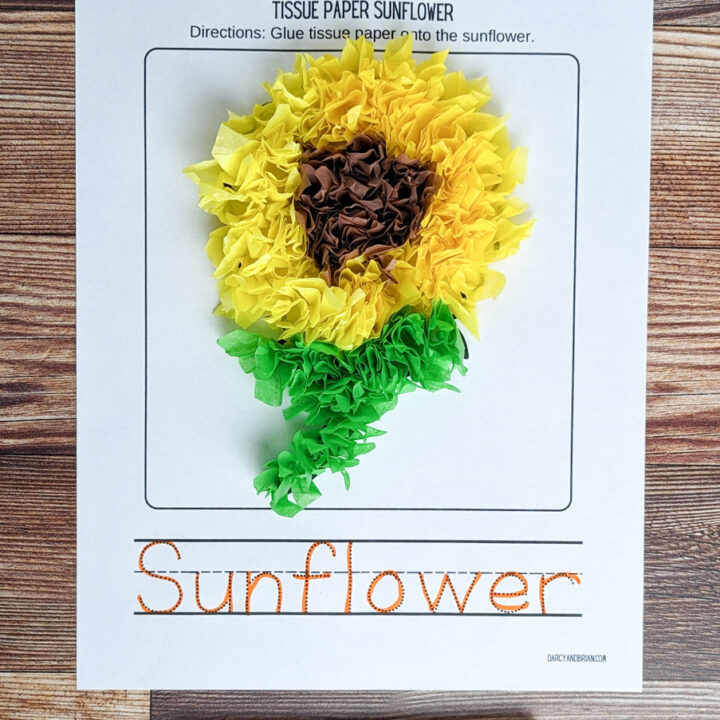
- Sunflowers: Use darker tissue paper for the center. Surround it with long, narrow petals in a bright yellow.
Each type of flower provides an opportunity to teach kids about shapes, symmetry, and natural flower varieties. Encourage children to experiment with mixing colors and petal shapes to create their own unique tissue paper flowers. Over time, they can build a vibrant garden that doesn’t need any watering!
Tissue Paper Stained Glass Art
Transforming tissue paper into faux stained glass art can be a magical experience for kids. They can watch as sunlight filters through their colorful creations, casting a rainbow of shadows in their room. It’s an excellent way for them to learn about colors and light. Plus, making stained glass art from tissue paper is a safe alternative to working with real glass.
How to Create Faux Stained Glass with Tissue Paper
To create your own tissue paper stained glass, you’ll need to:
- Collect Tissue Paper: Choose a variety of colors to make your design pop.
- Cut Shapes: Use scissors to cut the tissue paper into shapes for your design.
- Make Your Design: Arrange your shapes on a piece of clear contact paper.
- Seal the Artwork: Place another layer of contact paper over the top to seal it.
- Trim the Edges: Cut off any excess around the edges of your design.
- Display: Tape your faux stained glass on a window and let the light shine through.
Making tissue paper stained glass is a fun, safe activity. It also helps kids develop their fine motor skills as they handle delicate tissue and cut intricate shapes.
Best Practices for Tissue Paper Window Decor
To get the most out of your tissue paper window art, keep these tips in mind:
- Use Bright Colors: They give the best effect when the sun shines through.
- Smooth Out Bubbles: When you apply the contact paper, smooth out any air bubbles.
- Rotate Designs Seasonally: Keep things fresh by updating the designs every few months.
- Safety First: Always supervise the kids when they are using scissors.
Tissue paper crafts for kids are enjoyable and inspire creativity. With faux stained glass art, kids can create masterpieces that bring the essence of stained glass into your home without the hassle of real glass.
DIY Tissue Paper Butterfly Garland
A DIY tissue paper butterfly garland is a beautiful and whimsical addition to any child’s room or party decor. This craft intertwines the joy of creating with the beauty of butterflies, making it a perfect activity for kids who love nature and decorating. Below you’ll find the steps to create your own fluttering friends.
Cutting the Perfect Butterfly Shapes
To start, you’ll need:
- Colorful Tissue Paper: Let kids pick their favorite colors for their butterflies.
- Scissors: Sharp ones for clean cuts.
- Butterfly Template: A simple online search can give you many shapes.
- Fold Tissue Paper: Layer and fold your tissue paper.
- Trace Template: Place your butterfly template on the tissue paper.
- Cut Shapes: Carefully cut out the butterfly shapes following the template.
Choosing a variety of sizes and colors helps create a dynamic and visually interesting garland.
Assembling and Hanging Your Garland
Once your butterflies are cut out, it’s time to assemble your garland.
- Thread or Fishing Line: Choose a strong, thin line.
- Needle: This will help in threading the butterflies.
- Tape: Use clear tape to secure the butterflies if needed.
- Arrange Butterflies: Lay out your butterfly shapes in the order you want them.
- Thread the Line: Use a needle to thread the line through the top part of each butterfly.
- Secure Butterflies: Add a tiny piece of tape behind each butterfly to keep it in place.
- Hang Your Garland: Find the perfect spot and enjoy the fluttering effect of your tissue paper butterflies.
Completing this tissue paper craft for kids not only adds a decorative touch but also provides a sense of achievement for the little ones involved. It’s a splendid way to enhance their fine motor skills and allow for personal expression through their choice of colors and patterns.
Handmade Tissue Paper Bookmarks
Bookmarks are a lovely craft for young readers. Use tissue paper to teach kids about handcrafted treasures.
Designing Tissue Paper Bookmarks for Kids
Help children create appealing bookmarks by:
- Choosing Colors: Pick different colors of tissue paper.
- Cut Strips: Make long, even strips to fit the size of a book page.
- Add Decorations: Use stickers or drawings to personalize.
- Layer for Texture: Stack strips for a 3D effect.
Making bookmarks lets kids mix colors and shapes. They get to make their reading time more fun.
Laminating Your DIY Bookmarks for Durability
Laminating bookmarks will:
- Protect Them: Keep the bookmarks safe from tears and stains.
- Preserve Artwork: Save the kids’ designs.
- Make Them Last: Ensure the bookmarks can be used over and over.
Use clear contact paper or a laminating machine if you have one. Show kids how to cover their art properly. This step also gives a satisfying finish to the craft project.
From choosing tissue paper to laminating, this project is great for keeping kids engaged and fostering a love for books.
Tissue Paper Collage Picture Frames
Tissue paper crafts for kids bring joy and creativity to everyday objects, like picture frames. With tissue paper collage picture frames, children can showcase their photos in a vibrant, personalized manner. This craft combines the fun of collage with the simplicity of tissue paper manipulation, resulting in one-of-a-kind frames that kids can be proud of.
Preparing Your Materials and Frame
Before starting, gather your materials:
- Picture Frames: Use old or new frames.
- Colorful Tissue Paper: Pick various shades for a lively collage.
- Scissors: Needed to cut the paper into shapes.
- Glue: A simple glue stick or craft glue will work.
- Clean the Frame: Make sure the frame is dust-free.
- Cut Tissue Paper: Let kids snip tissue paper into pieces.
- Spread Glue: Cover the frame’s surface with glue.
- Place Tissue Paper: Stick tissue pieces onto the frame, overlapping for effect.
This process not only allows kids to exercise their creativity but also refine their cutting and gluing skills.
Encouraging Kids to Create Themed Collages
Theme ideas can spark even more creativity:
- Seasons: Use colors that reflect the season,
- Holidays: Opt for holiday-specific colors or motifs.
- Interests: Encourage kids to pick themes they love, like space or animals.
By choosing a theme, kids focus their creativity and learn about design and planning. They feel proud to display their themed frames, whether in their room or as gifts for family and friends. These tissue paper crafts for kids offer a memorable and enjoyable experience, blending artistic expression with practical crafting skills.

Upcycling Projects with Tissue Paper
Transform old tissue paper into new treasures through upcycling. This eco-friendly activity not only reuses materials but also sparks kids’ imaginations. From creating unique artwork to giving a new life to worn objects, the possibilities are endless.
Creative Ideas for Recycling Tissue Paper
Encourage kids to think green with these fun recycling projects:
- Tissue Paper Mosaics: Cut used tissue paper into small pieces for a colorful art piece.
- Pompom Bookmarks: Roll up strips of tissue paper to make fluffy ends for bookmarks.
- Decorative Jars: Wrap clear jars in colorful tissue for a stained glass effect.
- Custom Greeting Cards: Use bits of tissue as confetti or layered designs on cards.
By turning used tissue paper into crafts, children not only learn about recycling but also exercise their creativity in new ways.
Tissue Paper Projects to Enhance Fine Motor Skills
Tissue paper crafts for kids are great for improving dexterity. Here are ideas to boost fine motor skills:
- Tear and Paste Collage: Encourage tearing small pieces and pasting them to create a collage.
- Make Mini Flowers: Folding and twisting tiny tissue pieces into flowers is a great skill builder.
- String Beads with Pompoms: Attach tissue pompoms to strings like beads to enhance coordination.
These projects require precise movements that help strengthen little hands and fingers. Tissue paper is a fun way to develop essential skills while crafting.